
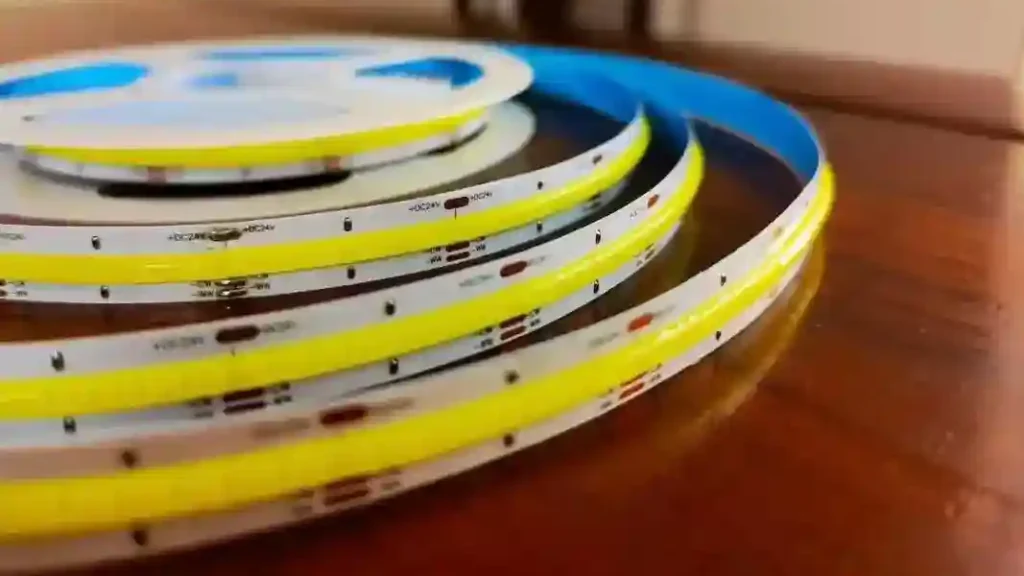
A 12v cob led strip is a granularity choice before it is anything else. At the same power per metre it draws twice the current of a 24V build and reaches roughly half the run length, but it cuts in shorter series groups — which is exactly what a 300 mm shelf module or a narrow joinery groove needs.
That trade is the whole decision. This guide sets out the arithmetic behind it, so B2B buyers specifying COB LED Strip for cabinets, displays, signage details and small architectural features can tell where 12V is the correct answer and where it is simply the harder one.
The Cut Interval Is the Real Reason to Choose 12V
Most guidance frames this as a run-length question. It is more useful as a segment-length question, because that is the constraint 24V cannot solve.
Both voltages wire their emitters in series groups, and a strip can only be cut at a group boundary. Doubling the bus voltage doubles the dies per group, so the 24V cut unit is roughly twice the 12V one. A 12V build therefore gives finer granularity: where a 24V strip might only cut every 50 mm, the 12V equivalent cuts at about half that.
That matters whenever the finished length is fixed by something other than the lighting. A shelf is 340 mm internally; a signage return is 180 mm. If the cut interval does not divide into that dimension the run falls short of the end, and a dark gap at the end of a shelf is visible from standing distance — on short modules a 24V strip can leave a gap several times larger than a 12V one.
So the order of questions is: what is the shortest fixed segment on the drawing, and does the cut interval divide into it? Ask for the interval in mm rather than in cuttable units, because dies per group tells a buyer nothing until it is converted to length.
What the Current Doubling Actually Costs
The price of that granularity is current, and it is worth computing rather than describing. Power is voltage times current, so a build drawing 10 W/m pulls about 0.83 A/m at 12V and 0.42 A/m at 24V. Two measurable consequences follow.
Voltage drop. Drop is current times the resistance of the copper, so doubling the current doubles the drop over the same conductor. The working limit is about 10% at the far end — past that the end of the run reads dimmer and slightly warmer, because the LEDs are driven below their design point. A 12V run reaches roughly half the length of the 24V equivalent before hitting that limit on identical copper.
Copper weight. The circuit carries that current in two thin traces, usually 1 oz or 2 oz per square foot, and the 2 oz build halves the resistance at the same width. On 12V this is not a refinement but what determines whether a run works: a 1 oz 8 mm strip has a much shorter usable length than the same geometry in 2 oz. Ask for it explicitly — it is rarely on a datasheet and it is the most useful single number for predicting 12V behaviour.
Two design moves recover most of the lost length without changing voltage. Feeding from both ends roughly halves the worst-case drop, since no point is more than half the run from a supply; splitting a line into two sections fed from a central point does the same. Both cost cable and one termination, and both are cheaper than finding the gradient after the joinery is installed.
Choosing Between the Two Voltages on a Drawing
Have an LED Lighting Project?
Share your project requirements — our engineering team will configure the complete LED strip system (strips + profiles + controllers + power supplies) and send you a detailed proposal within 24 hours.
Read the table against the drawing rather than against a preference. In most joinery packages both voltages appear, on different elements of the same job.
| What the drawing shows | Points to 12V | Points to 24V |
|---|---|---|
| Shortest fixed segment | Under roughly 400 mm, or an awkward dimension the cut interval must divide into | Long continuous lines with no fixed end dimension |
| Longest continuous run | Within the drop limit at the copper weight offered | Beyond what 12V reaches without extra feeds |
| Driver position | Transformer sits inside the cabinet, cable run of a metre or two | Driver in a remote plant space or ceiling void |
| Number of separate elements | Many small independently switched modules | One system on shared control |
| Existing site equipment | 12V supplies already installed and being reused | New installation with free choice of driver |
The pattern: 12V wins on granularity and proximity, 24V on distance. Where a run is long, a 24v cob led strip is the lower-risk answer and a 12v cob led strip should not be forced onto it. Standardising one voltage across a project has its own value — one driver family, one spares holding, no possibility of a 12V reel reaching a 24V circuit — so where the shortest segment allows it, that consolidation is usually worth more than optimising each element separately.
Close-View Installations Are the Unforgiving Case
Almost every 12V application puts the strip within arm’s reach of the observer, and that changes which specifications matter. Two defects that pass unnoticed on a ceiling cove are obvious under a shelf.
Emitter structure
For individual emitters to blend into one line, diffuser depth must be at least equal to the LED pitch. COB pitch satisfies this in almost any profile, which is why it is specified over discrete packages wherever the source is visible. But cabinet channels are shallow — often only a few millimetres between strip and diffuser — so the margin is thinner than it looks. Check the internal depth of the profile, not its external height.
Colour consistency between adjacent runs
Under a run of cabinets two strips are seen side by side, which is the hardest test for colour matching. Tolerance is measured in SDCM steps on the MacAdam ellipse: at 3 steps the difference is generally not visible, at 5 steps it is. On a ceiling this rarely matters; across a kitchen or retail bay it is the first thing anyone notices. Specify the step, and specify whether it holds across production lots or only within one — the second cabinet run often arrives months after the first.
Colour rendering matters for the same reason, and the standard COB build is CRI 90, appropriate for retail display and joinery where materials have to read correctly. Measurement methodology comes from bodies including the International Commission on Illumination and the Illuminating Engineering Society, which is what makes a colour requirement enforceable rather than a preference.
The Profile Is Part of the Electrical Design
COB produces heat continuously along its length rather than at points, so the extruded profile is not trim — it is the heat sink. Junction temperature governs lumen maintenance, which is what LM-80 data on a datasheet describes. A strip mounted to bare timber or plasterboard has no meaningful thermal path, so it runs hotter than the data assumes and depreciates faster than the curve predicts.
This is more acute in cabinet work than architectural work, because the enclosures are small and often closed — a wardrobe with the door shut has almost no air exchange. Specify aluminium, and confirm the strip is bonded flat along its whole length rather than bridging a gap.
Two dimensions must be checked before density is discussed. Internal groove width in mm sets maximum PCB width — an 8 mm strip needs more than 8 mm of clearance, not exactly 8 mm, because the channel has draft and the adhesive has thickness. Internal depth sets whether the diffuser will blend the emitters. Take both from the profile drawing, not a product photograph.
The adhesive holds the strip against that metal through repeated thermal cycles, a harder duty than it appears: a substituted tape passes on the bench and releases months later at temperature. In an overhead cabinet the cost of that is access, not product, so on long or hard-to-reach runs mechanical clips alongside the tape are cheap insurance.
Matched 12V Product Options
Two builds cover most 12V work, separated by what the lighting has to do rather than by grade.
For single-colour work, COB 320 LEDs/m 8 mm is the standard choice: 8 mm suits the shallow channels used in joinery, and 320 LEDs/m gives a continuous line at these short viewing distances. It is an IP20 build at CRI 90, correct for dry interior cabinetry, shelving and display detail. Where humidity is involved, a sealed build is a different assembly and should be specified separately rather than treated as a coating on this one.
For colour-changing work, RGB COB 810 LEDs/m 10 mm 12V is a native 12V build. RGB needs three separately driven channels, so die count is high and the circuit is wider at 10 mm — check that against the groove, since a 10 mm strip will not retrofit into a channel cut for 8 mm. It also needs a controller between driver and strip, matched for both voltage and channel count. The RGB COB LED strip guide covers the wider options before samples are confirmed.
Driver sizing is the same arithmetic either way. Total the wattage on the circuit and divide by 0.8 — a driver should sit at roughly 80% of its rating for thermal headroom, and one run at full nameplate output fails early. Five 1.2 m runs of a 10 W/m build total 60 W, so the driver should be 75 W or larger. Include the controller’s own consumption on an RGB circuit.
Wiring, Control and the Safety Boundary
Low-voltage strip sits inside the SELV provisions of IEC 61140, which is why the driver belongs in the specification rather than being bought afterwards. The protection depends on the whole chain, so a compliant strip on an unverified supply is not a compliant installation.
Keep the driver close to the load. At 12V the cable between supply and strip carries the same doubled current as the strip, so a long feed adds its own drop on top of the drop along the run — and a length that computes correctly on paper still fails if three metres of undersized flex sits in front of it. Where the driver must be remote, size the feed cable for the current rather than for convenience.
If the installation is dimmed, confirm the method before ordering: PWM and constant-voltage analogue dimming behave differently at low output, and driver and controller have to agree. For building-level control the DALI Alliance documents the addressable ecosystem a joinery circuit may have to interface with. Cutting and connection sequence are covered in the guide on how to install COB LED strip lights.
How to Evaluate a Sample So It Predicts Production
A 300 mm sample energised on a desk shows the colour temperature and nothing else. Every failure mode specific to 12V — the gradient along the run, the temperature inside a closed enclosure, whether the interval divides into the module — is invisible at that scale. To be predictive, a sample has to be assembled the way the job will be.
- Build the longest run, not a section. Voltage drop is a function of length, so a short piece cannot show it. Energise the full intended length and compare the two ends.
- Measure at the far end. Put a meter on the end terminals under load and check against nominal. Under about 10% is workable; more means adding a feed or moving to 24V. The eye adapts along a gradient, so this needs to be a number.
- Mount it in the real profile. Intended channel, diffuser and orientation — fit and emitter blending cannot be assessed loose.
- Use the intended driver and cable length. Bench supplies have short leads and generous headroom, hiding both the feed-cable drop and an undersized driver.
- Let it reach temperature in the closed enclosure. Half an hour with the door shut, then feel the profile. Thermal problems do not appear in the first minutes.
- Judge from the real viewing position. Standing height for under-cabinet, seated for a display case. Brightness assessed at 300 mm is meaningless.
- Compare two pieces side by side against the final surface. The only reliable colour check, and the material matters — the same strip reads differently against oak and white laminate.
For repeat programmes, ask for batch labelling and a written specification record against the approved sample, so the second delivery can be checked against the first rather than against memory. Senfey’s case study hub holds references that can be matched to your application type, voltage and installation environment.
Colour Temperature Where the Light Is Seen Close Up
Because these runs sit near the observer, colour temperature carries more weight than in architectural lighting, where the strip is usually hidden. Warmer tones suit hospitality and residential-style interiors and read comfortably against timber and warm finishes; neutral tones suit retail display, functional joinery and workspaces where materials and product colour need to read accurately.
Two practical points are easy to miss. Mixing CCTs on adjacent elements looks like a defect even when both are correct in isolation, so hold one temperature per visual field rather than per room. And every additional colour temperature is a separate production lot with its own binning, which is why reducing the CCT count across a project usually saves more than any other single decision. Comparison of the white options is set out in the warm white cob led strip guide.
Common Questions on 12V COB Strip
Is 12V worse than 24V?
No — they solve different problems. 12V gives a shorter cut interval, so it fits fixed short module lengths that 24V cannot divide into cleanly. 24V halves the current at the same power, so it runs further before hitting the drop limit. Choose from the shortest fixed segment and the longest continuous run on the drawing, in that order.
How long a run will a 12V COB strip support?
It depends on copper weight and W/m, not on voltage alone, so ask the supplier for the maximum single-feed length at the copper weight they are quoting. The limit is about 10% drop at the far end. Feeding from both ends roughly halves the worst-case drop and can nearly double the workable length.
Can a 12v cob led strip be used on commercial projects?
Yes, and it is the usual choice for cabinets, shelving, display cases and compact signage details in commercial fit-outs. The limitation is length rather than sector: for long ceiling or corridor lines, 24V is the more practical layout.
Does 12V need a different profile?
The profile follows PCB width, not voltage — an 8 mm strip needs the same channel at either voltage. What changes is that a 12V run generates the same heat over a shorter length, so the thermal path matters just as much. Always specify aluminium, and check internal groove width and depth against the strip before ordering.
Send Us the Drawing
The fastest way to get a voltage recommendation worth acting on is to send the constraints rather than ask which is better. The shortest fixed segment, the longest continuous run, the internal groove width and depth of the profile, whether feed is available at one end or both, and the target colour temperature are enough for us to determine whether 12V is the right answer for your job — and to say so if it is not. Talk to our engineers to review model selection, driver sizing and sample requirements against your drawing.
