
A dotless cob led strip is not a product category with a pass or fail state. Whether a line reads as continuous is decided by the ratio between emitter spacing and the distance from those emitters to the diffuser — which makes the profile as much a part of the specification as the strip. The same strip is dotless in one channel and visibly scalloped in another.
This guide covers the geometry that produces a seamless line, what flexibility does and does not permit in a COB LED Strip, why joints and voltage drop break continuity the strip itself delivered, and how to write a specification a sample can be judged against.
What Dotless Actually Describes
COB means chip-on-board: bare dies mounted directly onto the circuit under a continuous phosphor layer, rather than individually packaged emitters soldered down at intervals. What matters for continuity is not the mounting method but what it permits — pitch, the centre-to-centre distance between light-emitting points.
Run the arithmetic. A 60 LEDs/m SMD strip has a pitch of about 16.7 mm. A 480 LEDs/m COB construction is about 2.1 mm, and 528 LEDs/m about 1.9 mm — roughly an eight-fold reduction. That is the entire mechanism: closely spaced sources overlap sooner, so peaks and troughs of intensity blend into an even field over a much shorter distance.
The phosphor layer contributes too, scattering light laterally before it leaves the strip and softening the boundary between adjacent dies. But it does not eliminate pitch — it shortens the distance over which pitch stops being visible. A COB strip viewed close enough with no diffuser still shows structure.
So a dotless cob led strip claim is a claim about a viewing condition, and a supplier asserting it without stating that condition has told you nothing checkable. Ask instead at what distance and behind what diffuser the line becomes uniform.
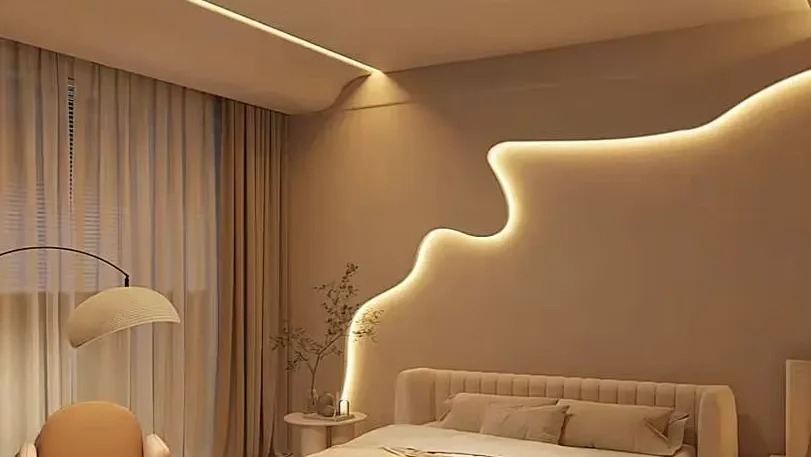
The Rule That Decides Whether You See Dots
One relationship sits behind every uniformity outcome: the distance from the emitters to the diffuser, compared with the pitch between them. As a working rule, when that distance is comparable to or greater than the pitch, adjacent light cones have overlapped enough that the surface reads even. When it is much smaller, each emitter still projects its own bright patch onto the diffuser.
This is why the same strip behaves differently in different channels, and why the failure is almost always the profile rather than the strip. At a 2 mm pitch even a shallow channel puts the diffuser several pitches away, which is why high-density COB is forgiving. At 16.7 mm the diffuser has to sit well clear of the board before scalloping disappears — which is why SMD needs a deep profile to achieve what COB achieves in a flat one.
Two consequences follow that buyers rarely connect:
- Density buys profile freedom, not just smoothness. A denser strip lets you use a shallower channel for the same result. If joinery constrains you to a 6 mm groove, density is how you meet that constraint.
- Diffuser choice trades uniformity against output. An opal lens scatters more and hides more, at a cost of roughly 20–35% of output. A clear or lightly frosted cover keeps more light and hides less. You are choosing a point on that curve, not a better part.
The practical error is buying the densest strip available, then mounting it behind a clear cover in a flush channel because the catalogue said dotless. Density and diffuser have to be decided together, against the actual section.
Dotless Is a Viewing Condition, Not a Product State
Have an LED Lighting Project?
Share your project requirements — our engineering team will configure the complete LED strip system (strips + profiles + controllers + power supplies) and send you a detailed proposal within 24 hours.
The other half of the geometry is the observer. Uniformity that fails on a bench at 200 mm can be invisible at 2 m, because the eye’s ability to resolve two nearby points falls with distance. A cove line 3 m overhead and a handrail line 300 mm from the hand are not the same specification problem, even with identical hardware. Three viewing conditions decide how hard the requirement is:
| Condition | Why it matters | What it changes |
|---|---|---|
| Direct view of the aperture | Observer sees the emitting surface itself | Hardest case: needs density and a scattering diffuser |
| Indirect, washing a surface | Observer sees reflected light, not the source | Scalloping shows on the washed surface, not the lens |
| Grazing a nearby surface | Light strikes at a shallow angle | Unforgiving: shallow angles exaggerate variation |
The third row catches projects out. A strip washing a wall at a shallow angle stretches every intensity variation into a long visible band, so a strip that looks flawless head-on can produce obvious striping on the plaster. Where the design grazes a finish, the uniformity requirement is stricter than the direct-view case, not looser.
So an approval statement has to name the distance. “Dotless” is not a specification. “No visible variation from 1.5 m at the design viewing angle, in the project profile with the project diffuser” is one, and it can be tested. Visual comfort framing for that kind of criterion is documented by IES.
What Flexible Permits and What It Does Not
Flexible describes one axis of movement. A flexible printed circuit bends readily along its length, perpendicular to the board — the direction that lets it follow a cove radius or curve over the front edge of a shelf. It does not bend in the plane of the board, and it does not twist without stressing the circuit.
That asymmetry tells you where damage happens. Bending puts the outer face of the circuit in tension and the inner face in compression, and strain grows as the radius tightens. Copper traces tolerate this within limits; the joints between the dies and the copper tolerate it less. So a bend that looks acceptable can have opened a connection under a die, and the failure appears later as a dead section.
Three limits therefore need confirming before a curved detail is approved:
- Minimum radius, as a number. Ask for it in millimetres. A wider board has a wider copper cross-section and tolerates less tight a bend, so radius and width are linked.
- Direction only. A 90° change of direction in the plane of the board is not a bend — it needs two runs meeting or a purpose-made corner piece, and either way it interrupts the line.
- No repeated flexing. These circuits are specified to be formed once and fixed. A detail where the strip moves in service is a different requirement.
Board width interacts with all three, and with the channel it sits in. An 8 mm construction such as the COB LED strip at 480 LEDs/m suits narrower grooves and tighter cove radii, while a 10 mm board carries current further on a wider copper section. The full trade-off — clearance, current capacity, thermal path — is in the wide cob led strip guide.
Every Joint Interrupts the Line You Paid For
The strip arrives continuous. Installation breaks it, and the breaks are visible precisely because the rest of the line is not. That is the paradox of specifying a seamless product: the smoother the run, the more any interruption stands out.
Cut position is the first constraint. The circuit is divided into series groups, and a cut must fall on a group boundary or the rest of that group will not light. At high density those boundaries are close together, which helps — but “close together” is not a dimension. If a cove section is 1,840 mm and the cut unit does not divide into it, you either accept a short fall at one end or plan an overlap, and that decision belongs on the drawing, not with the installer. The cut unit on a 24V circuit is typically about twice the 12V version of the same construction, because more dies sit in each series group.
Corners are the second. A corner connector leaves a gap where no light is emitted, and on a continuous line that reads as a dark notch. Where the corner is in view, overlapping the ends of two runs so their light fields cross gives a better result than any corner piece — a detail that costs nothing at design stage and cannot be added later. Cut intervals, bend limits and corner handling are set out in the how to cut COB LED strip guide.
The third surprises buyers most: a cut is also a colour risk. Sections from different reels can differ enough in tint to show as a step where they meet end-to-end, even within the same nominal CCT. On a continuous line the eye compares the two halves directly, so a difference that would pass unnoticed in separate fixtures becomes visible. Order unbroken runs from one batch where the line is in view.
Uniformity Along the Run
Pitch decides uniformity across a few millimetres. Voltage drop decides it across the whole run, and it is the failure most often mistaken for a strip defect. Current flowing through the circuit’s own copper drops voltage along the length, so the far end runs at lower voltage, draws less current and emits less light.
A continuous line is the worst case for this. A gradient of a few percent along a row of separate fixtures is invisible, because the eye has nothing to compare against between them. On an unbroken line it has a reference along the entire length, so the same gradient becomes a visible fade. The seamlessness that justified the product is what exposes the electrical shortfall.
The working limit is about 10% drop at the far end, and voltage choice is the main lever. At a given power, current is inversely proportional to voltage: a 12 W/m load draws 1 A/m at 12V but 0.5 A/m at 24V, and since drop scales with current, the 24V run holds its brightness roughly twice as far. That is the case for a 24v cob led strip on any continuous run beyond a short cabinet section.
Where a single feed cannot hold that limit, the fix is layout, not a larger driver. Feeding from both ends roughly quarters the worst-case drop, because each half carries half the current over half the distance. A bigger driver raises available current without changing the resistance of the copper, so it does not address the gradient at all.
Where the Line Is in View
A dotless cob led strip is worth paying for wherever the light line itself is part of what the observer sees. Where the strip is concealed and only its effect is visible, density buys much less.
Hotel and residential cove work
The strip is hidden but the wash on the ceiling is the finished product, so any scalloping in the emitted field prints onto the plaster. Because the throw is indirect, cove runs lose the most to geometry and are often specified brighter than the room’s target suggests. Run length is the harder problem — a long perimeter cove is exactly where drop shows as a fade. See hotel cove lighting COB LED strip and villa living room COB LED strip cove lighting; CCT selection sits in the warm white cob led strip guide.
Handrails and close-range lines
The hardest case here. The observer is within arm’s length, often looking straight into the aperture, and the run follows a curve so bend radius and cut position both bind. Access is poor once the rail is assembled, which makes soldered joints and a single continuous section the default rather than the upgrade — see stair handrail COB LED strip lighting.
Cabinets, shelves and joinery
Short runs, so drop is rarely the issue; the constraint is the groove. Joinery gives you the channel depth it gives you, and if that is shallow the only remaining variable is pitch. This is where a 528 LEDs/m board like the COB LED strip earns its specification — not through more output than a lower-density strip of equal wattage, but by reaching uniformity in less depth.
Specifying It So the Sample Proves Something
A loose strip lit on a desk cannot demonstrate uniformity, because the two variables that decide it — diffuser distance and viewing distance — are both absent. A sample test is evidence only if it reproduces the installed geometry.
- Mount the sample in the project profile with the project diffuser, at the design distance from the observer.
- View it from the design angle, not from directly in front. If the design grazes a surface, set the sample up grazing that surface.
- Check it against the actual finish material. Dark timber and white plaster return completely different results from identical hardware.
- Form the sample to the tightest radius the drawing requires and leave it powered — a strained joint reads normal at first.
- If the run is long, test at full length or read voltage at the far end.
- Where two sections meet, check the joint for a tint step as well as a gap.
What to send a supplier is the section, not the wish: channel depth and internal width, diffuser type, distance and angle from the observer, run length and voltage, the tightest bend radius in the detail, section lengths, CCT and CRI. Those inputs determine the density and width answer; the word “seamless” does not.
What to ask for in return is a stated uniformity condition rather than an adjective, pitch in millimetres rather than only LEDs per metre, minimum bend radius as a number, the cut unit for your voltage, and colour tolerance in SDCM so sections and repeat orders match. Colorimetric conventions behind tolerance figures are maintained by the International Commission on Illumination.
FAQ
Is every COB LED strip dotless?
No, and the strip alone cannot settle it. A 480 LEDs/m COB has a pitch near 2.1 mm against 16.7 mm for a 60 LEDs/m SMD strip, so it reaches uniformity in far less depth — but viewed close enough with no diffuser, structure is still visible. Dotless is the strip, the profile and the viewing distance together.
Can a flexible COB strip turn a 90° corner?
Not as a bend. These circuits flex along their length, perpendicular to the board, not sideways in its plane. A 90° direction change needs two runs meeting or a corner piece, and both interrupt the line. Where the corner is visible, overlapping two runs reads better than a corner connector.
Do dotless COB strips need an aluminium profile?
For any run that has to look continuous, yes. The profile sets the diffuser distance that produces uniformity, and it is also the heat path, since COB puts continuous thermal load along the board. Because output falls as junction temperature rises — the reason IES LM-80 data is reported at defined case temperatures — a run without a profile is both an optical and a thermal compromise. See the U.S. Department of Energy LED lighting guide.
Why does one end of my run look dimmer?
Voltage drop, not a strip fault. The far end runs at lower voltage, draws less current and emits less light. Keep drop within about 10% of nominal, use 24V on long runs, and feed from both ends — which roughly quarters the worst case.
Send the Section Drawing
Uniformity is geometry, so it can be worked out before anything is ordered. Send channel depth and width, diffuser type, viewing distance and angle, run length and voltage, the tightest radius in the detail and the section lengths — pitch, board width, cut unit and feed positions all follow. Contact Senfey with the section and we will specify against the geometry rather than against the word seamless.
